

I want to start off this post by saying that I’m NOT a carpenter. I actually didn’t even know what a Sawzall (it’s a reciprocating saw) was until recently, and I just learned to make cuts on a miter saw (I had to cut baseboards at an angle). But I am a mother of three young kids who is trying to come up with ways to entertain the children during the pandemic.
My daughter was about to turn three, and I wanted to make her birthday special. When we recently visited my in-laws who have a sandbox on their property, the kids played in it for HOURS. Scooping, shoveling, pouring, sometimes throwing (which results in immediate removal from the sandbox)… the sandbox was a perfect outdoor spot for sensory and imaginative play. Sadly, most (if not all) of the playgrounds in Flagstaff don’t have sand and we haven’t been able to go to the playground since the pandemic anyway. Therefore, I opted to bring the playground to our backyard by building a sandbox.
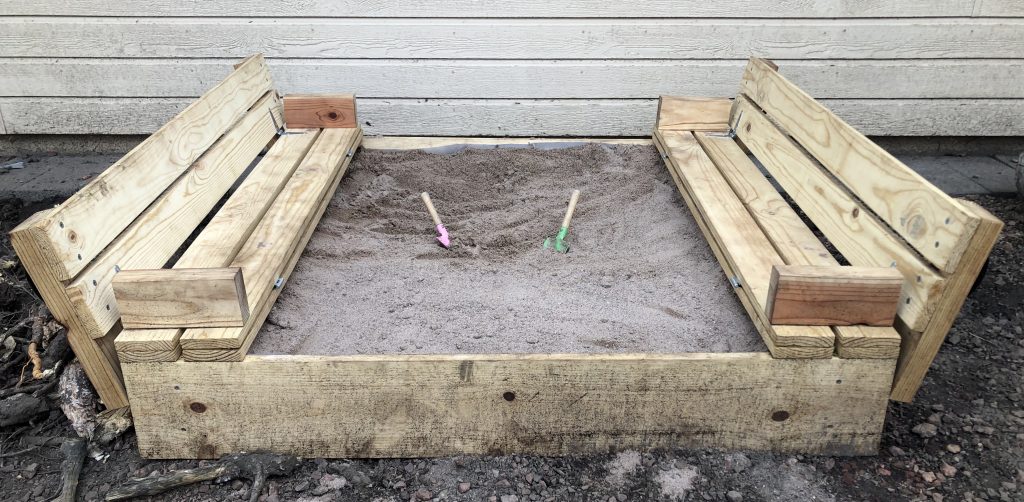
I spent some time searching for an appropriate design. I ultimately decided to go with a sandbox that has double-duty lids that convert to built-in seats in order to have a cover for when it is not being used. Covering up the sandbox keeps out the neighborhood cats and makes it harder for rocks, leaves and general yard debris to infiltrate it.
This is what the final product looked like:
This is a video that shows how you open up the sandbox and convert the cover into seats: My awesome sandbox
This is the YouTube link that gave me a quick tutorial on how to build a sandbox with bench seats: https://www.youtube.com/watch?v=IT6Z_9Vt3dc
This is the plan I followed: http://www.ana-white.com/2011/10/plans/sand-box-built-seats
I was able to get all the materials I need at Home Depot under $100. If you want to waterproof the surface, you can apply an exterior stain and sealer to repel moisture and have the sandbox last longer. Depending on the brand, a gallon of all-in-one wood stain and sealer will cost $20-40. I only needed a quart but ended up buying a gallon because that’s what Home Depot carried in person.
As for the sand, you can buy play sand that has been washed, dried and screened from Home Depot for $4-5 per 50 lb bag. However, I chose to purchase mortar sand at Landscape Connection, a local company that sells bulk rocks, sand, cinder, etc. This type of sand has been washed, and it is finer and less dusty than concrete sand. I only needed a quarter cubic yard for my sandbox but the smallest quantity I could purchase was a half cubic yard, which costs around $25. This was still significantly cheaper than buying several 50 lb bags from Home Depot.
These are the general steps I took to make the sandbox and how long it took. Understand that I’m not a professional and I was doing this at night (i.e. when I’m tired) because this was supposed to be a surprise for my daughter.
- Sanding (not required but I didn’t want the kids to get splinters) – 1 hr
- Cutting the pieces into the right length – 30 min
- Filling in holes with wood glue – 15 min
- Sanding dried glue areas and the ends of each board once the pieces were cut – 15 min
- Applying stain and sealer on half of the surfaces – 30 min
- Letting the pieces dry overnight
- Applying stain and sealer on the other half of the surfaces – 30 min
- Letting the pieces dry again
- Assembling the sandbox – 1 hr with another person (one person would hold the pieces together while the other person drilled because the boards weren’t always straight)
- Stapling the landscape fabric on the bottom (not required but I wanted to keep the sand separate from the dirt and prevent weeds growing up below the sand) – 10 min
- Unloading the sand and filling the sandbox – 20 min
If you have room in your backyard for a sandbox, I would urge you to find the inner carpenter in you and start building!


")
